

How To Check Apache Tomcat Version On Windows Server
Introduction
Apache Tomcat is an open-source web server and servlet container for Java code. Tomcat executes programs written in the Java programming language, and it implements many Java EE specifications, including Jakarta Servlet, Jakarta Server Pages, and others.
In this tutorial, you will acquire to install the Apache Tomcat server on Windows.
Prerequisites:
- Java JRE installed and configured
- Administrator privileges
How to Install Tomcat on Windows
In this department, we will embrace two ways of installing the Tomcat web server:
- Via Windows Service Installer.
- From a zip annal.
Follow the steps below to download and install Tomcat.
Step 1: Download Tomcat for Windows
To download the Tomcat installation file, follow the steps beneath:
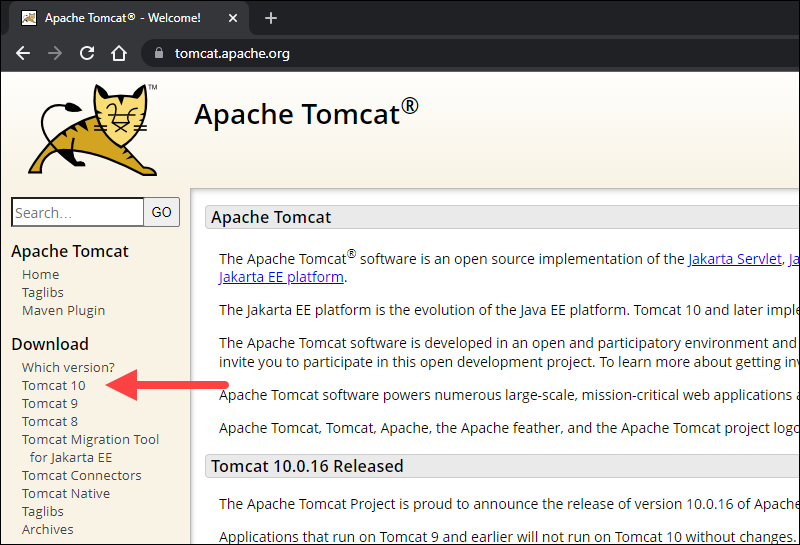
1. Browse to the official Apache Tomcat website. Locate the Download section and click the latest Tomcat version bachelor. At the time of writing this article, the latest Tomcat version was version x.
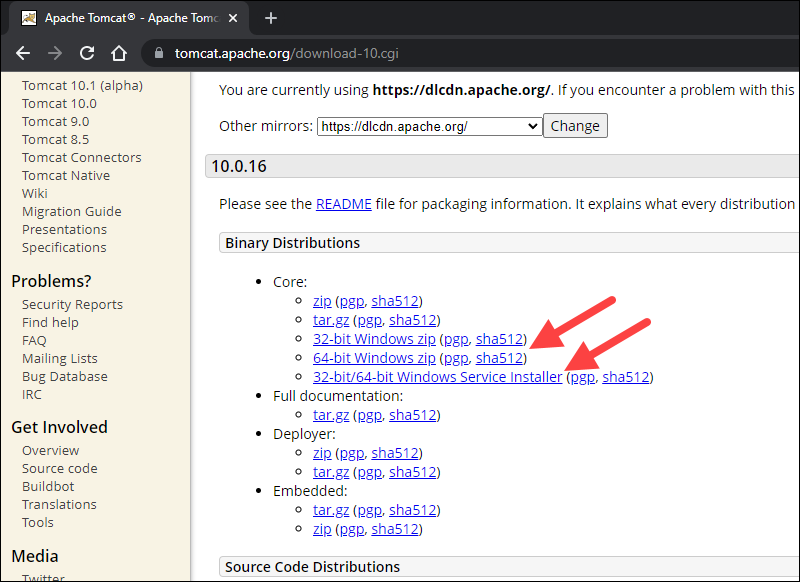
two. On the Download page, scroll downwards and locate the Binary Distributions area.
In the Core list, depending on the installation type you prefer, click the download link for the Windows Service Installer or the 32bit/64bit Windows cypher file.
Step 2: Install Tomcat
Install Tomcat via the Windows Service Installer for an automated and wizard-guided feel. The service installer installs the Tomcat service and runs information technology automatically when the organisation boots.
For a portable experience, install Tomcat using the naught file and avert installing the service. Hands uninstall Tomcat when it is no longer needed past deleting the Tomcat directory, or movement it effectually when necessary.
Notation: Have a look at our list of 13 all-time Java IDEs, which help write, debug, and examination Java code.
Method 1: Install Tomcat Using the Windows Service Installer
Follow the steps beneath to install Tomcat using the Windows Service Installer.
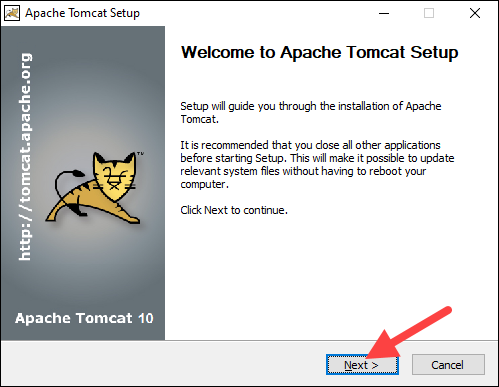
1. Open the downloaded Windows Service Installer file to starting time the installation process.
2. In the Tomcat Setup welcome screen, click Side by side to go on.
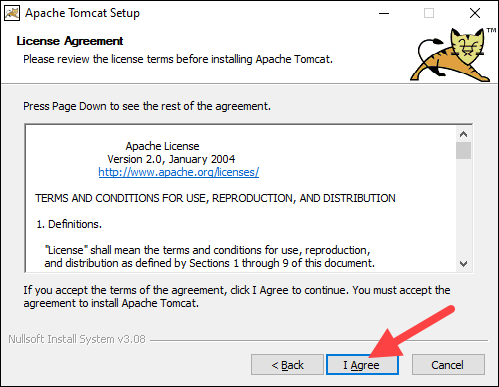
3. Read the License Agreement and if you lot agree to the terms, click I Agree to keep to the side by side footstep.
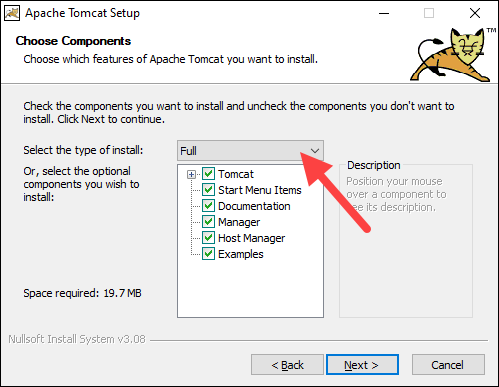
four. In the Tomcat component option screen, choose Full in the dropdown menu to ensure the sorcerer installs the Tomcat Host Director and Servlet and JSP examples spider web applications. Alternatively, continue the default Normal installation blazon and click Adjacent.
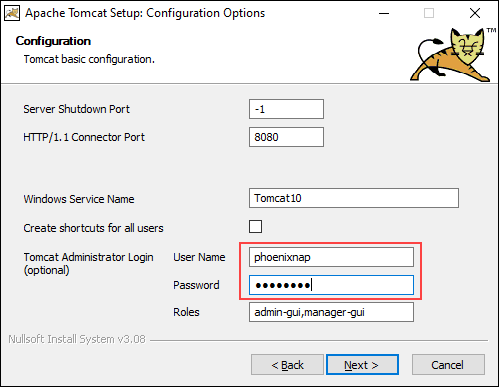
5. The next pace configures the Tomcat server. For instance, enter the Administrator login credentials or choose a different connection port. When finished, click Side by side to proceed to the next step.
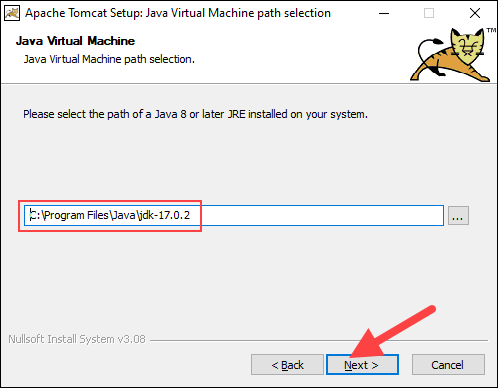
6. The next step requires you to enter the full path to the JRE directory on your system. The sorcerer auto-completes this if y'all take previously set up the Java environment variables. Click Side by side to proceed to the next step.
7. Choose the Tomcat server install location or keep the default one and click Install.

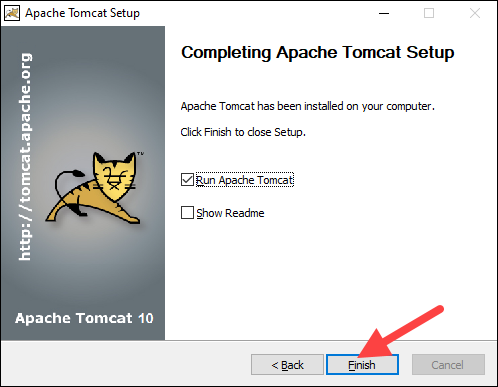
8. Check the Run Apache Tomcat box to start the service afterward the installation finishes. Optionally, check the Show Readme box to encounter the Readme file. To complete the installation, click Finish.
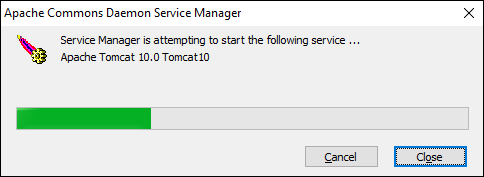
nine. A popup window appears that starts the Tomcat service. Subsequently the process completes, the window closes automatically. The Apache Tomcat web server is now successfully installed .
Method 2: Install Tomcat Using the zilch Archive
Follow the steps below to set the Tomcat server using the zero annal.
ane. Later on downloading the 32bit/64bit Windows zilch file, depending on your Windows version, unzip the downloaded file. Right-click the file and select Excerpt all...
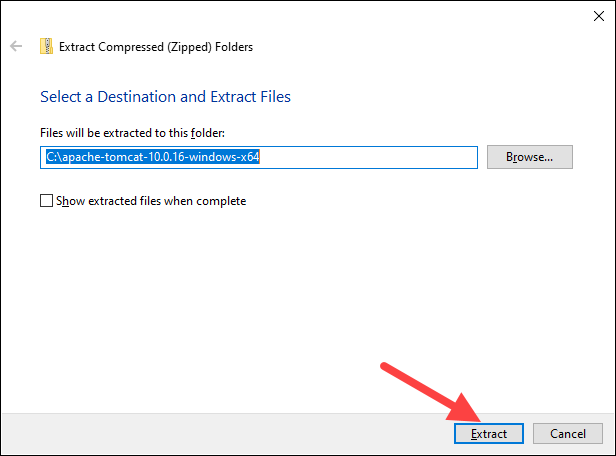
2. Choose where to extract the annal contents. For easier navigation, we recommend extracting it to the hard bulldoze'south root. Optionally, give the directory a shorter proper name to facilitate server configuration later. Click Extract to start the process.
3. Navigate to the conf sub-directory within the extracted directory and locate the server.xml file.
Important: Back up the .xml files earlier making any changes.
4. The default connexion port is 8080 . To cull a different port, edit the server.xml file with a text editor, such every bit Notepad++, and locate the following lines:
<Connector port="8080" protocol="HTTP/1.1" connectionTimeout="20000" redirectPort="8443" /> Change the connector port number to any number between 1024 and 65535 .
5. To enable directory browsing, locate the web.xml file in the conf directory and edit the file with a text editor. Directory browsing helps when testing the organization, and sometimes it may be the solution for a 403 forbidden fault.
Locate the following lines and change the listings value from false to true :
<servlet> <servlet-name>default</servlet-name> <servlet-class>org.apache.catalina.servlets.DefaultServlet</servlet-class> <init-param> <param-proper name>debug</param-proper name> <param-value>0</param-value> </init-param> <init-param> <param-name>listings</param-proper name> <param-value>false</param-value> </init-param> <load-on-startup>ane</load-on-startup> </servlet> 6. Implement an auto-reload feature by editing the context.xml file. Higher up all, machine-reload is useful in development to prevent restarting the server manually each time a alter is fabricated.
Using a text editor, open the context.xml file. Locate the following line and change the value from faux to truthful in each instance:
<Context reloadable="false" crossContext="imitation" parallelAnnotationScanning="faux"> ...... ...... </Context> vii. After making the changes, start the server. Press the Windows key and blazon cmd. Press Enter to open a Command Prompt window.
eight. Move to the bin directory of your Tomcat server and run:
startup 
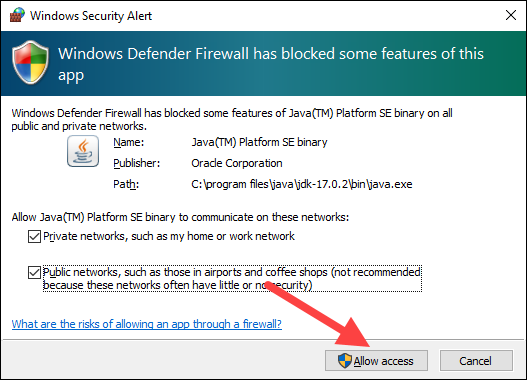
viii. Add an exception for Tomcat in the firewall:
9. A new Tomcat console window appears. This console receives error messages and system.out.println() messages issued past the Java servlets.
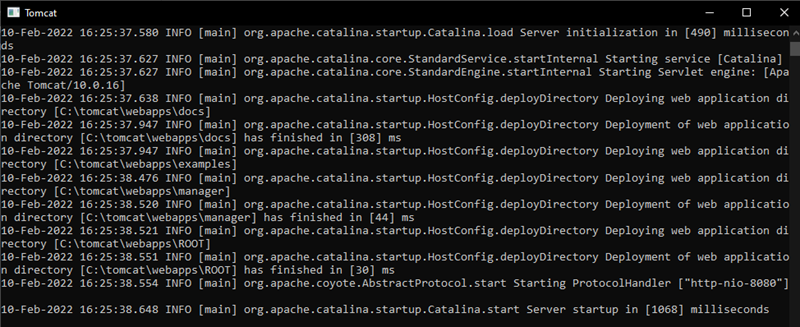
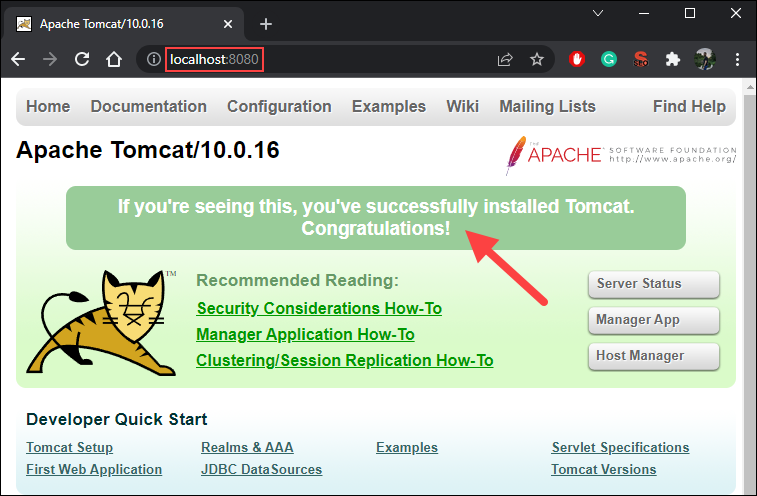
10. Access the server using a browser as an HTTP client. Scan to http://localhost:8080 and access the Tomcat welcome page to ensure the server works.
In addition, use the Developer Quick Start links to run into more information nigh the server and commencement using and configuring the server.
xi. Shut down the Tomcat server by pressing Ctrl+C on the Tomcat console.
Footstep three: Check if Apache Tomcat Service Is Running
Installing Tomcat using the Windows Service Installer installs Tomcat every bit a Windows service that automatically runs on boot. Follow the steps beneath to ensure that Tomcat is started equally a Windows service.
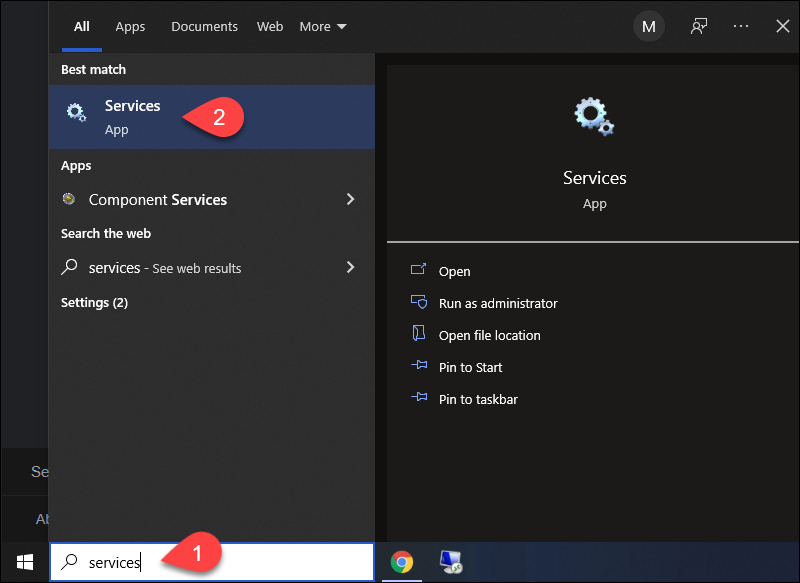
1. Open the Start carte and search for Services.
two. Select the Services outcome.
3. In the Services window, locate the Apache Tomcat service. The Status column indicates whether the service is running or not. Start or Stop the service using the buttons in the toolbar or by pressing Cease or Restart on the left side of the service list.
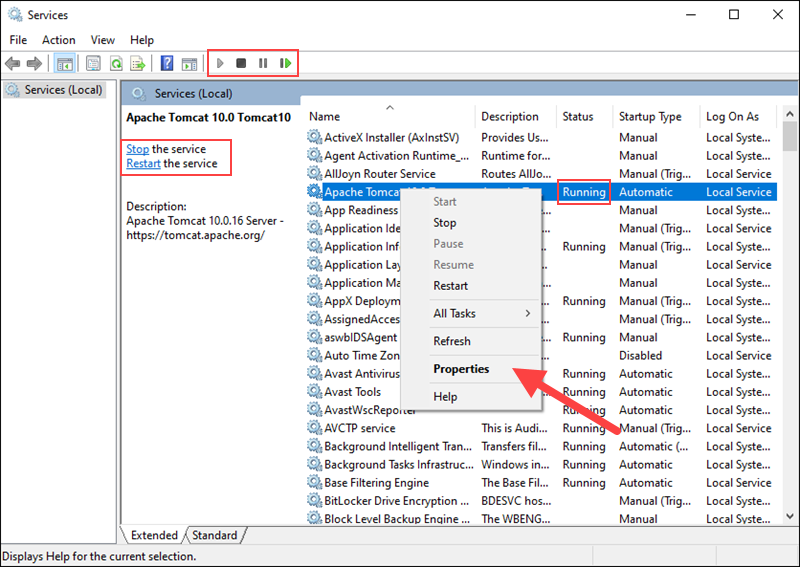
Configure the service startup by right-clicking the Tomcat service and selecting Properties.
4. In the Properties window, under the Startup type dropdown carte, select how to run the Tomcat service:
- Automatic (Delayed Start). Starts the service presently afterward boot. A delayed get-go improves server boot performance and has security benefits.
- Automated. Automatically starts the service on boot.
- Manual. The service starts only when Windows or another service needs it or if invoked.
- Disabled. Disables the service startup, fifty-fifty if you try to showtime it.
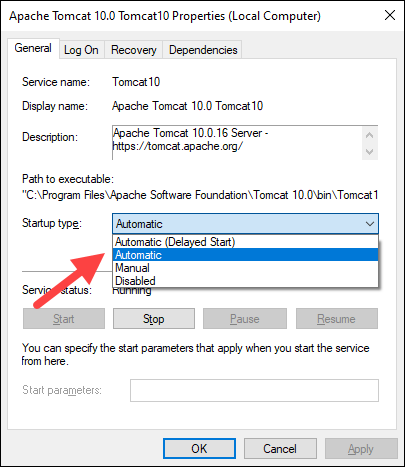
Click OK to confirm the changes.
Decision
This guide showed how to install the Apache Tomcat web server on Windows. While Tomcat doesn't provide all the features of Coffee EE, many applications require merely the features that Tomcat provides. Therefore, heavier tools aren't always necessary.
Learn more than about servers in our tutorial on big information servers, or learn what a database server is.
Was this commodity helpful?
Yes No
Source: https://phoenixnap.com/kb/install-tomcat-windows
Posted by: draughnmaystionite1970.blogspot.com
0 Response to "How To Check Apache Tomcat Version On Windows Server"
Post a Comment